Updated 10 min read
Send documents for e-signature in Xero Practice Manager
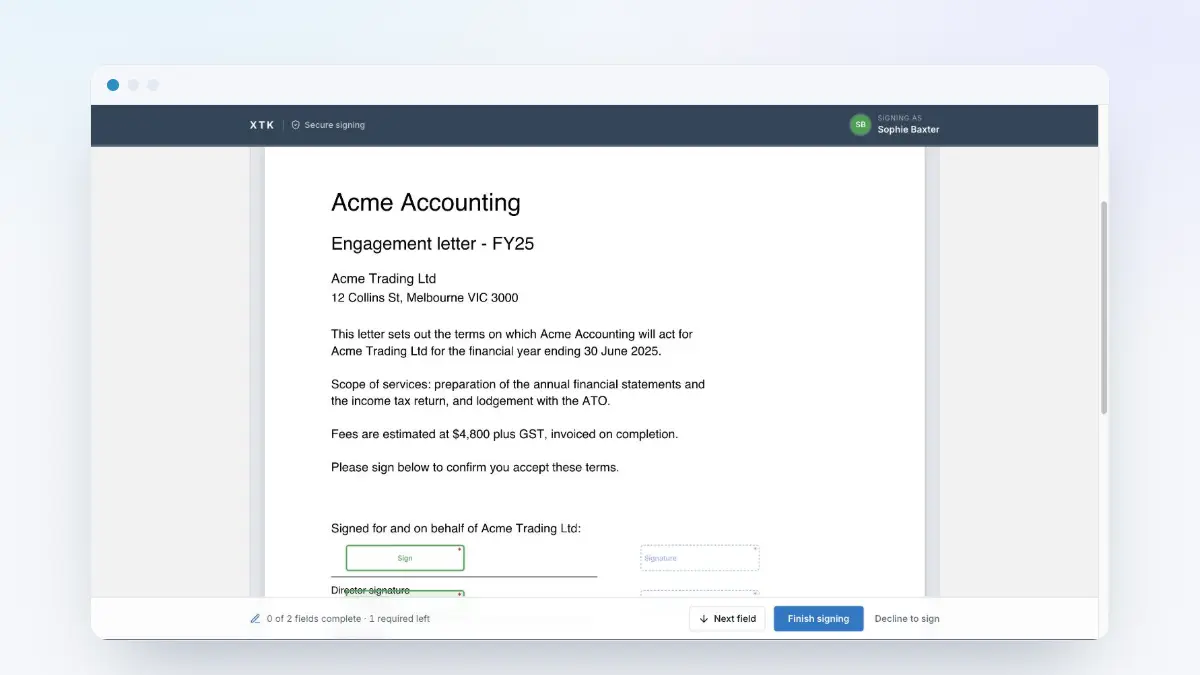
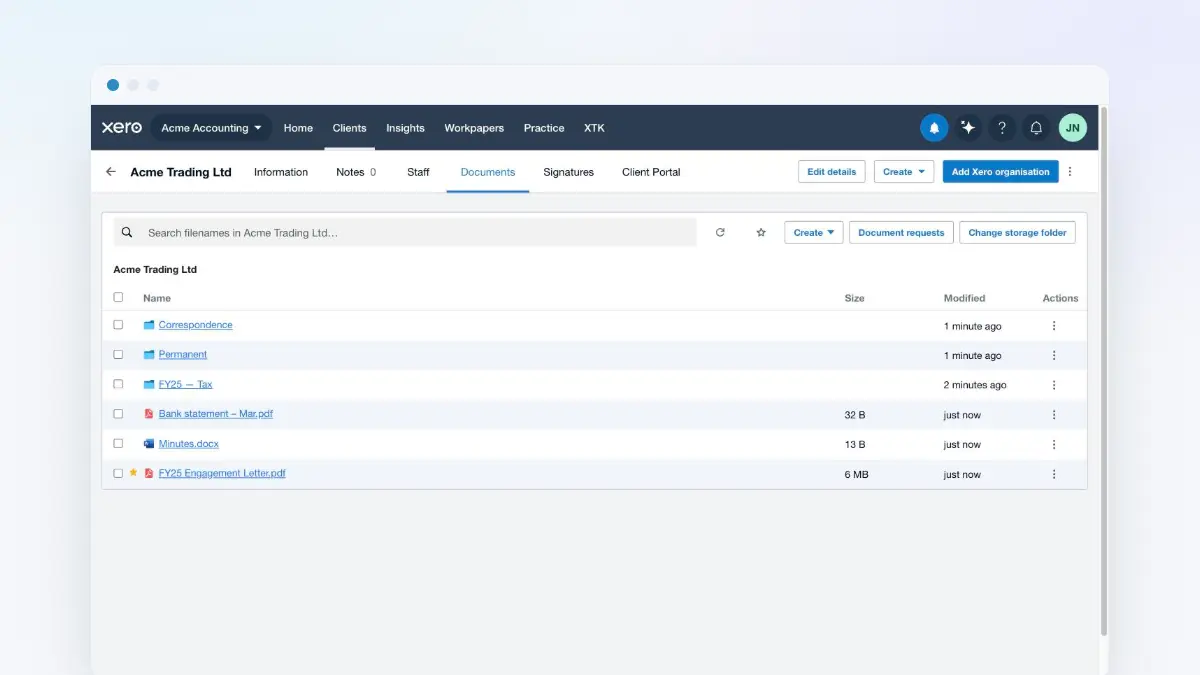
XTK adds e-signatures to Xero Practice Manager (XPM): pick a PDF from a client's folder, add the people who need to sign, drag fields onto the page, and send. Signers get an emailed link and sign in an ordinary browser — no account, no app, no per-signature fee. When the last one signs, a flattened “… (signed).pdf” with a Certificate of Completion appended lands back in that client's folder. If the question you actually need answered first is whether an e-signed engagement letter holds up, the legality and the evidence it has to carry are covered separately.
XTK is an independent product and is not affiliated with or endorsed by Xero Limited.
Two ways to start a signature request
Both open the same “New signature request” dialog; the only difference is whether a document is chosen for you.
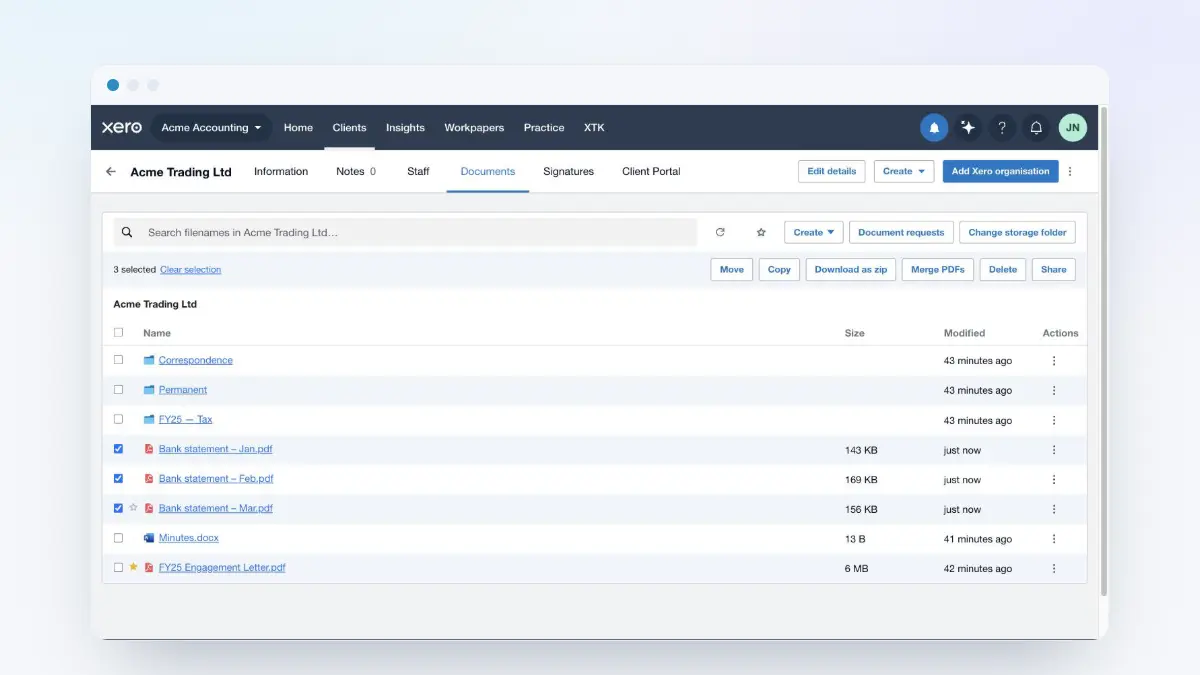
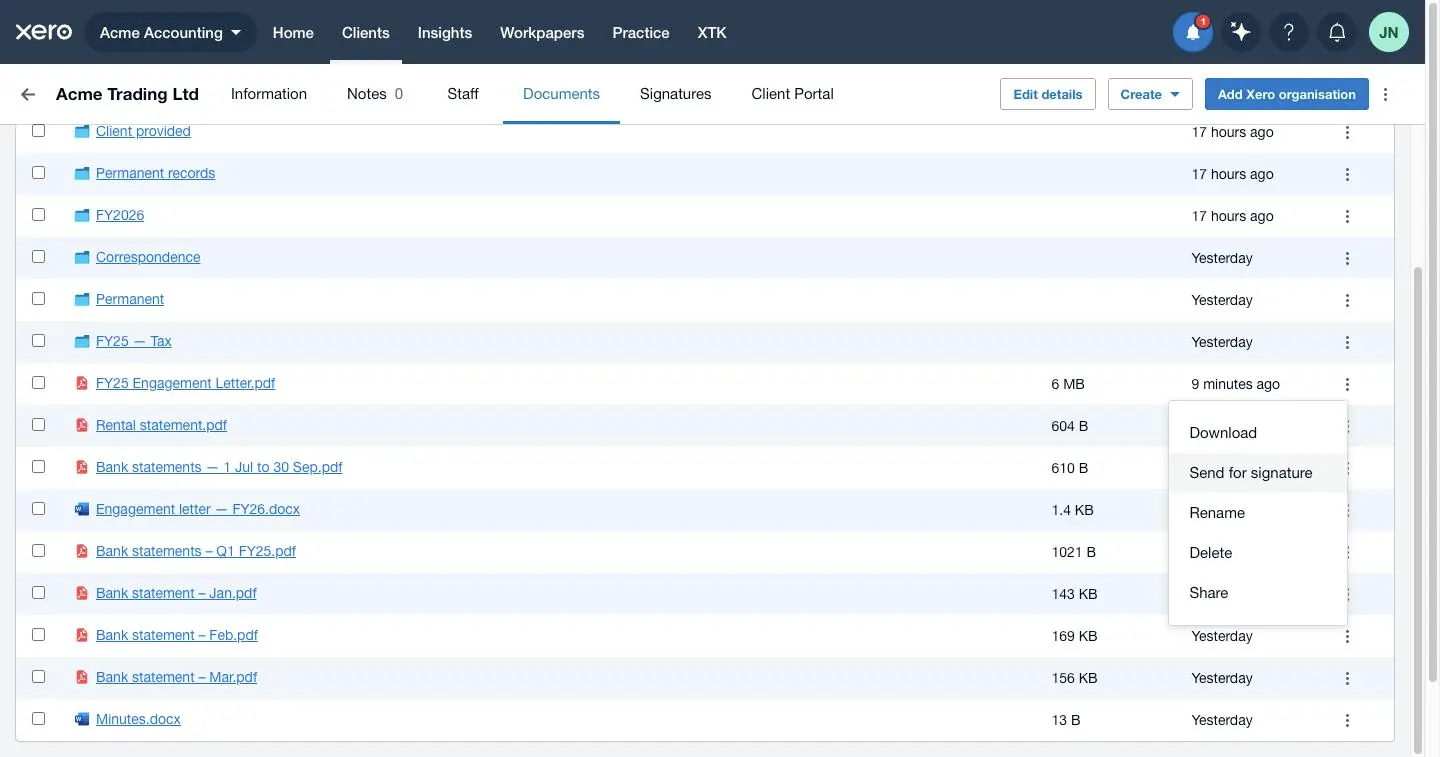
- From the Documents tab: the ⋮ menu on a PDF row has “Send for signature”, and the dialog opens with that PDF ticked. It appears on PDFs only — not on Word files or folders.
- From the Signatures tab: “New signature” at the top right. Nothing is pre-selected, so you pick the documents — the route when one request covers two or three PDFs.
How do I create the signature request?
Open the client and start a new request
Open the client in Practice Manager, then use a PDF's “Send for signature” or the Signatures tab's “New signature”.
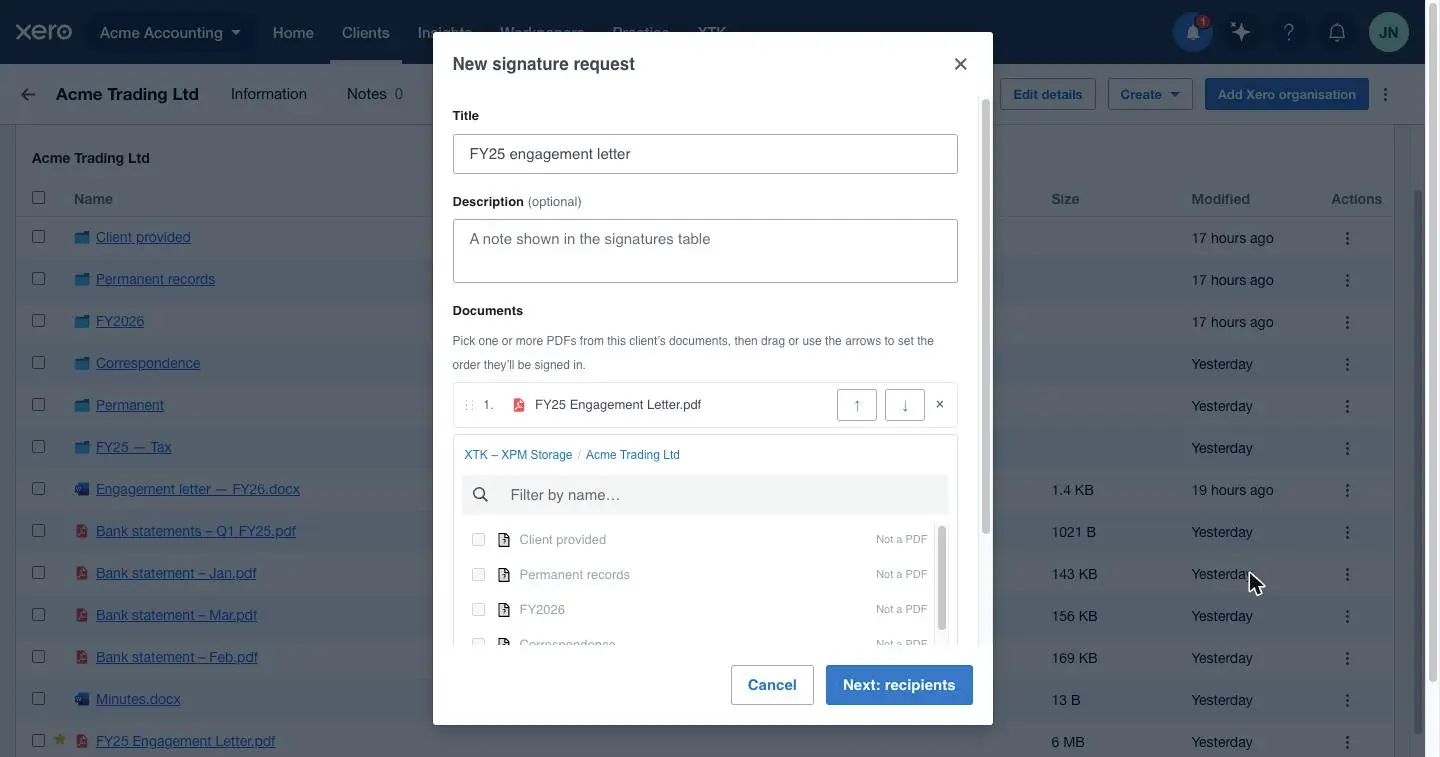
Give the request a title
The title names the request everywhere afterwards — the Signatures table, your notifications, and the default email subject — so use something a client would recognise: “FY25 engagement letter”. A description is optional and shows as a note under the title.
Tick the PDFs you want signed
The picker browses the client's own folder with a breadcrumb and filter box: folders open, PDFs get a checkbox, anything else is greyed out and marked “Not a PDF”. Choices survive folder navigation, so you can gather from several folders.
Put the documents in signing order
Selected documents form a numbered list above the picker. Drag the “⋮⋮” handle, or use “↑” and “↓”, to set their order; “×” removes one.
Click “Next: recipients”
The button stays greyed out until you have a title and at least one document.
Add the people who need to sign
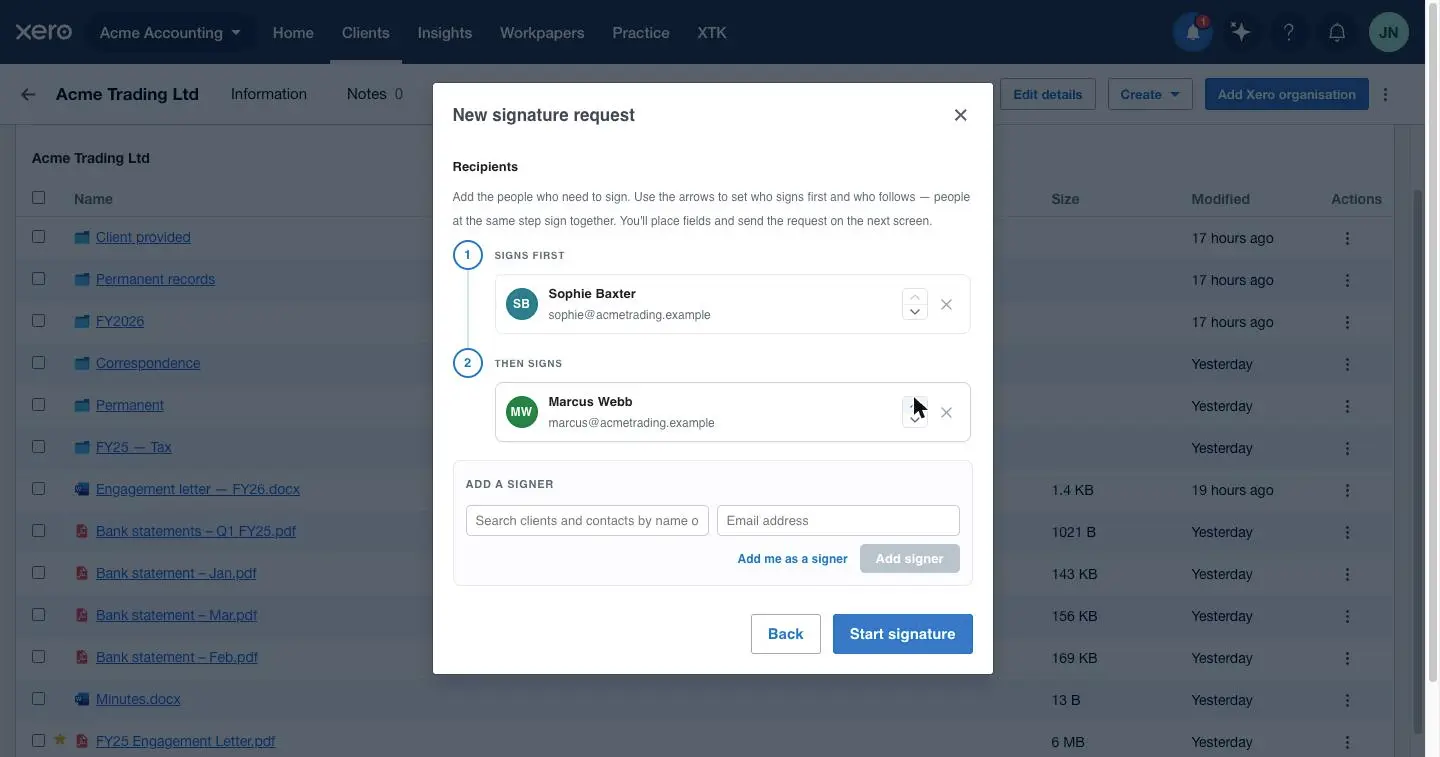
Type into “Search clients and contacts by name or email” and XTK offers matches from the client you have open, tagged Client or Contact, filling in the email. Or enter a name and email by hand, or use “Add me as a signer”. Click “Add signer” for each.
Set who signs first
Signers sit on numbered steps drawn as a flow down the left edge — step 1 reads “Signs first”, later ones “Then signs”. A card's up and down arrows move that signer between steps.
Click “Start signature”
This saves a draft and opens the authoring page in a new tab. Nothing has been emailed yet — a draft is safe to leave and come back to.
How does signing order work?
Order comes from each signer's step number: same step means together, different steps mean one after another.
- Everyone on step 1 (the default) is emailed the moment you send and can sign in any order; the group shows a “2 sign together” badge.
- A signer on step 2 isn't emailed at send time at all: their invitation goes out once every step-1 signer has signed — what you want when a client signs and a partner countersigns.
- There is no timer behind it: a step opens the moment the previous one finishes, and if a signer never signs, the next step never opens. Nudge them with “Resend link” in the Status dialog.
How do I place the fields on the page?
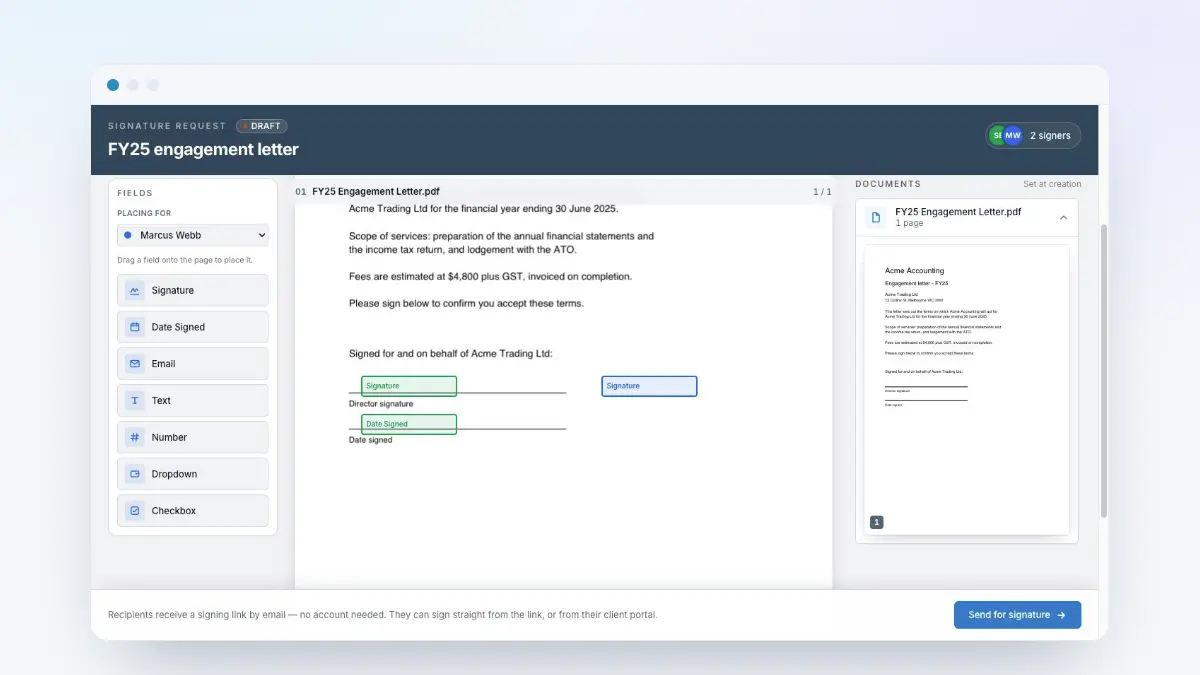
“Start signature” opens XTK's authoring page in a new tab. It sits outside Practice Manager on purpose: signers need somewhere public to sign, and one shared page renders the document identically for both of you. Documents stack as one continuous scroll with the field rail beside them and your signers along the top as coloured avatars.
Choose who you're placing for
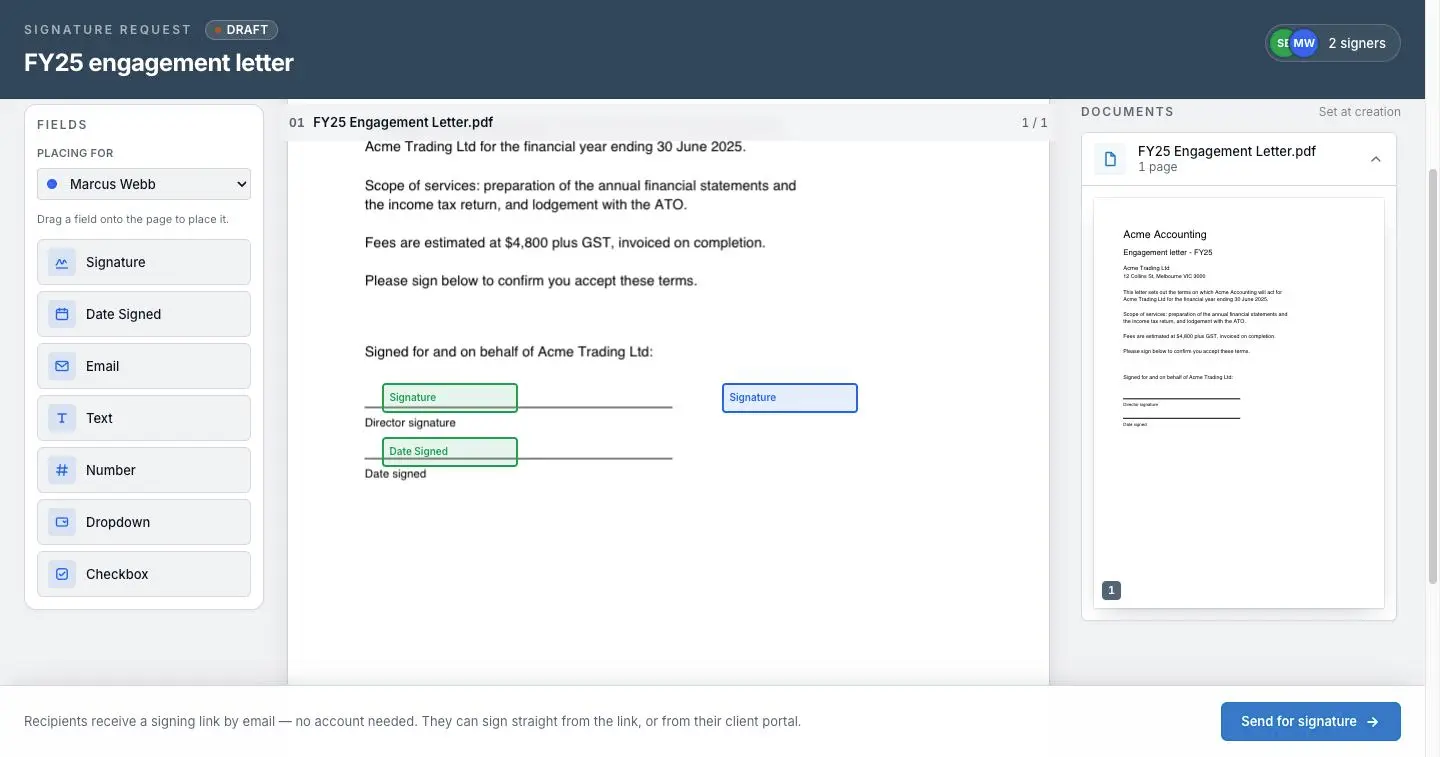
“Placing for” at the top of the rail sets which signer a new field belongs to. Every field takes that person's colour, so a two-signer document reads at a glance.
Drag a field onto the document
Drag a tile — “Signature”, “Date Signed”, “Text” and the rest — onto the page. It lands as a single-line box you can drag to move or pull by its handles to resize.
Click a placed field to set it up
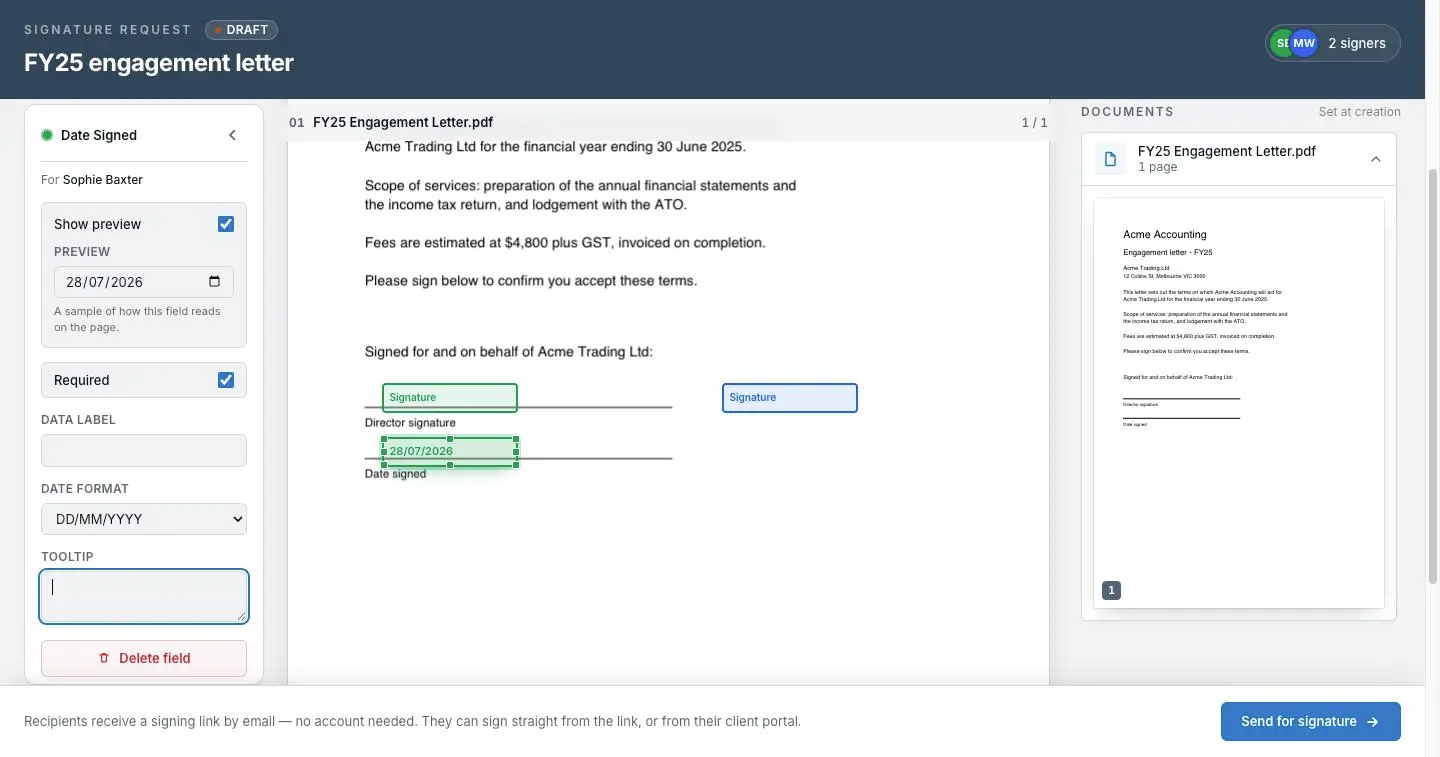
The rail swaps to its settings: “Required” (on by default), a “Data label”, a “Tooltip” the signer sees on hover, and any formatting the type needs. “Show preview” drops a sample value in so you can check it fits.
Repeat for every signer and every document
Switch “Placing for” to the next person and carry on, using the “Documents” rail to jump between files and pages. Escape returns you to the palette.
| Field | Who fills it in | Extra setting |
|---|---|---|
| Signature | The signer draws, types or reuses a saved signature | — |
| Date Signed | Filled in automatically at the moment they sign | Date format |
| The signer types an address; the shape is checked | — | |
| Text | The signer types free text | — |
| Number | The signer types a number; the shape is checked | Number format |
| Dropdown | The signer picks one of your options | Options, one per line |
| Checkbox | The signer ticks it | — |
How do I send it?
Click “Send for signature” in the bottom bar
The bar sits at the foot of the authoring page, and stays disabled until the request has at least one signer.
Check the subject
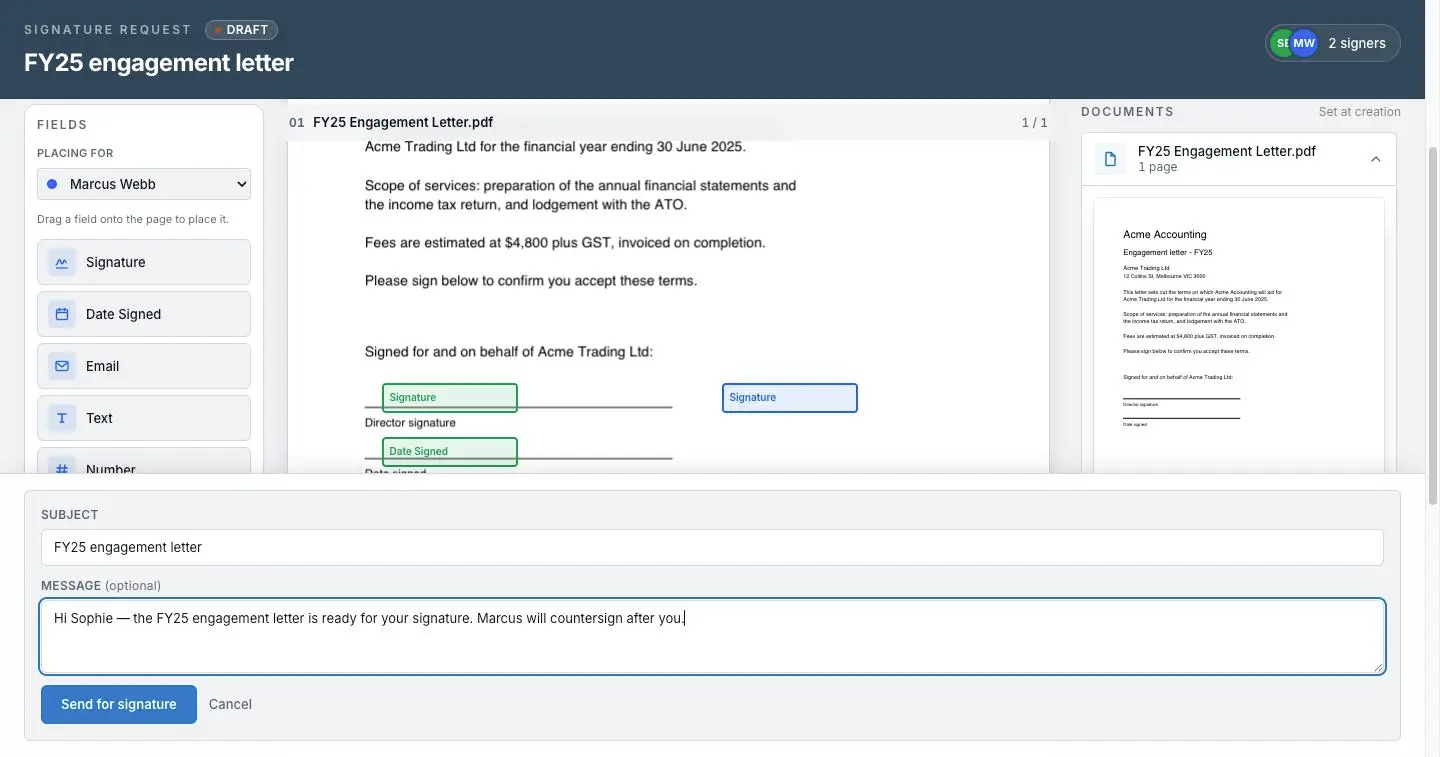
The subject is pre-filled with your request title, and it is what signers see in their inbox. Edit it if the internal title isn't what you'd say to a client.
Add a message (optional)
Anything here goes into the body of the signing invitation, above the link. Leave it empty and the standard wording goes out alone.
Click “Send for signature” to confirm
The request goes live: it locks against further edits, mints one single-use signing link per signer, and emails the first step. The bar confirms with “Signature request sent” and names the addresses emailed.
How do I track what's outstanding?
The client's Signatures tab holds every request from the moment it is created, with a search box matching the request title and filter buttons for All, Draft, In progress, Completed, Declined and Voided — “In progress” covers everything still out for signature.
Four columns say where a request stands: Name (title, description beneath), Status, Progress — “1 of 2 signed”, plus “1 viewing” when someone has opened it without signing — and Initiated, the date created.
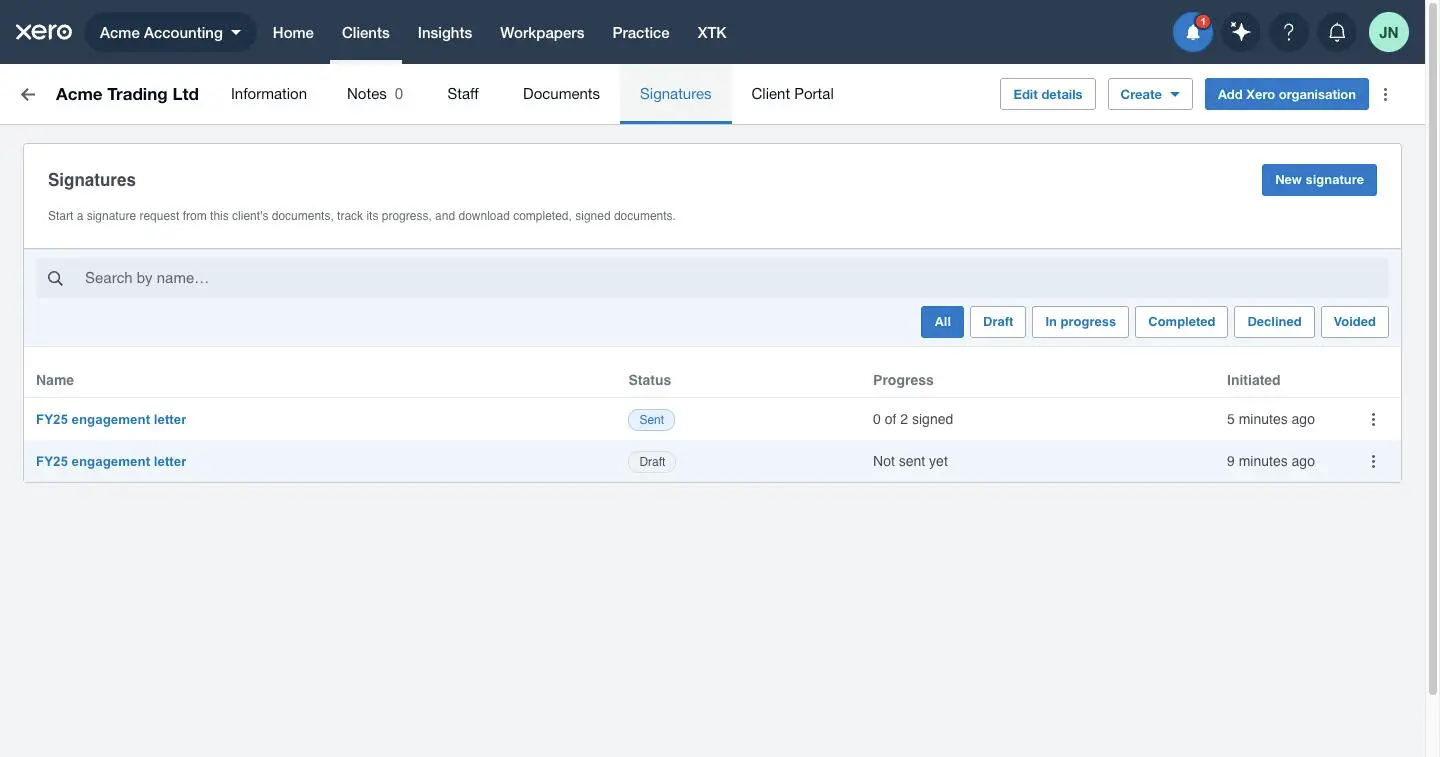
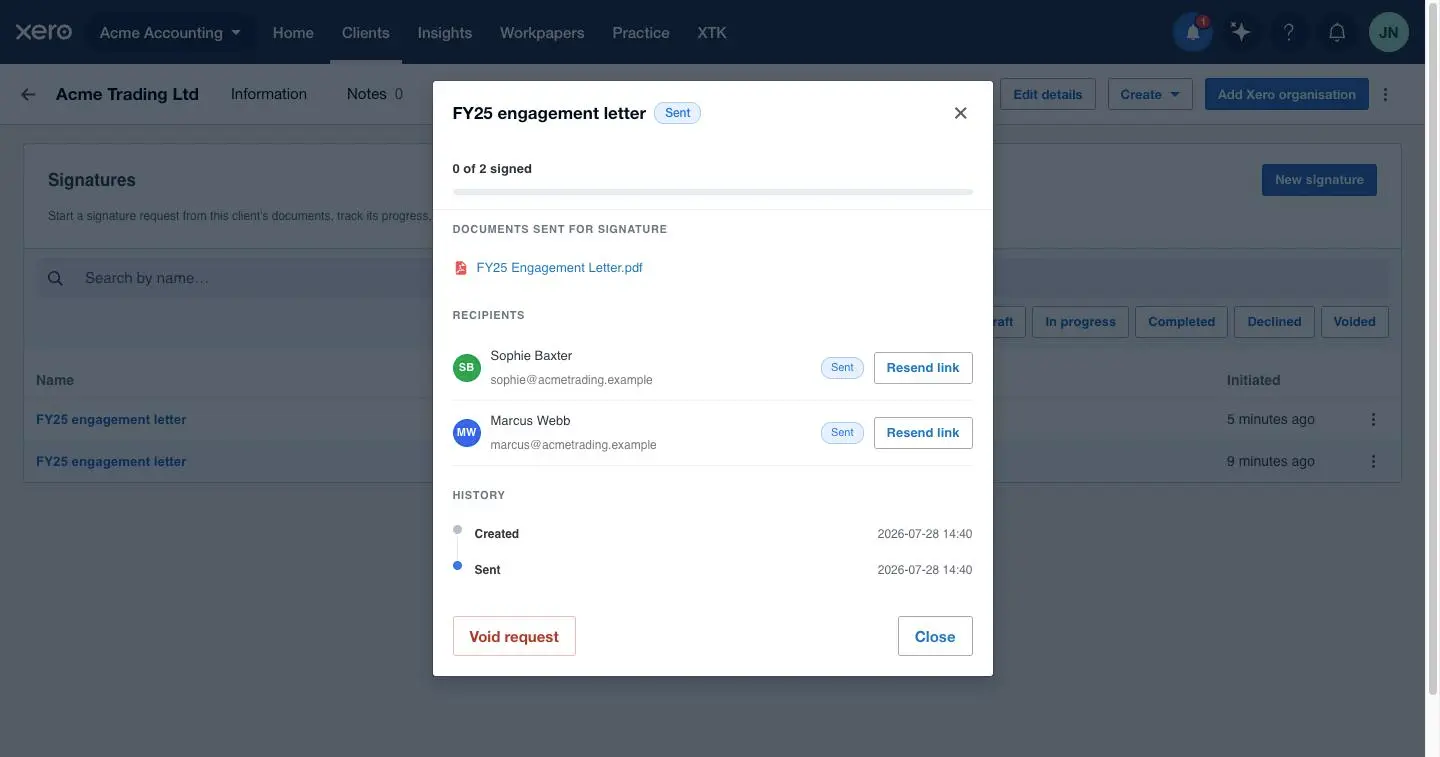
Clicking a row opens what suits its status: a draft reopens the authoring page, anything sent opens the Status dialog. The ⋮ menu carries that status's actions.
| Status | What it means | Row actions |
|---|---|---|
| Draft | Saved but never sent. No email has gone anywhere. | Continue · Edit recipients · Delete draft |
| Sent | The first step's signers have been emailed; nobody has signed. | Status · Void request |
| In progress | Someone has opened or signed it, and it is still going. | Status · Void request |
| Completed | Everyone signed; the signed PDF is in the client's folder. | Status · Download · Open folder |
| Declined | A signer declined, so the request stops there. | Status |
| Voided | You cancelled it, and every signing link is dead. | Status |
The Status dialog is where you chase people. It shows a progress bar, the documents that went out, and every signer's state — “Not yet notified”, “Sent”, “Viewed, not signed”, “Signed” or “Declined” — with “Resend link” beside anyone emailed who hasn't responded; resending retires the old link, so only the newest works. Below that, History lists created, sent, link resent, viewed, signed and completed in UTC — the record behind the Certificate of Completion.
How do I cancel a request I've already sent?
Void it. “Void request” sits in the row ⋮ menu and the Status dialog's footer, and appears only while a request is Sent or In progress; a draft is deleted instead, and a completed or declined one has nowhere left to go. Confirm in the “Void signature request” dialog and three things happen: every outstanding signing link stops working, the recipients are emailed that it was cancelled, and the row flips to Voided.
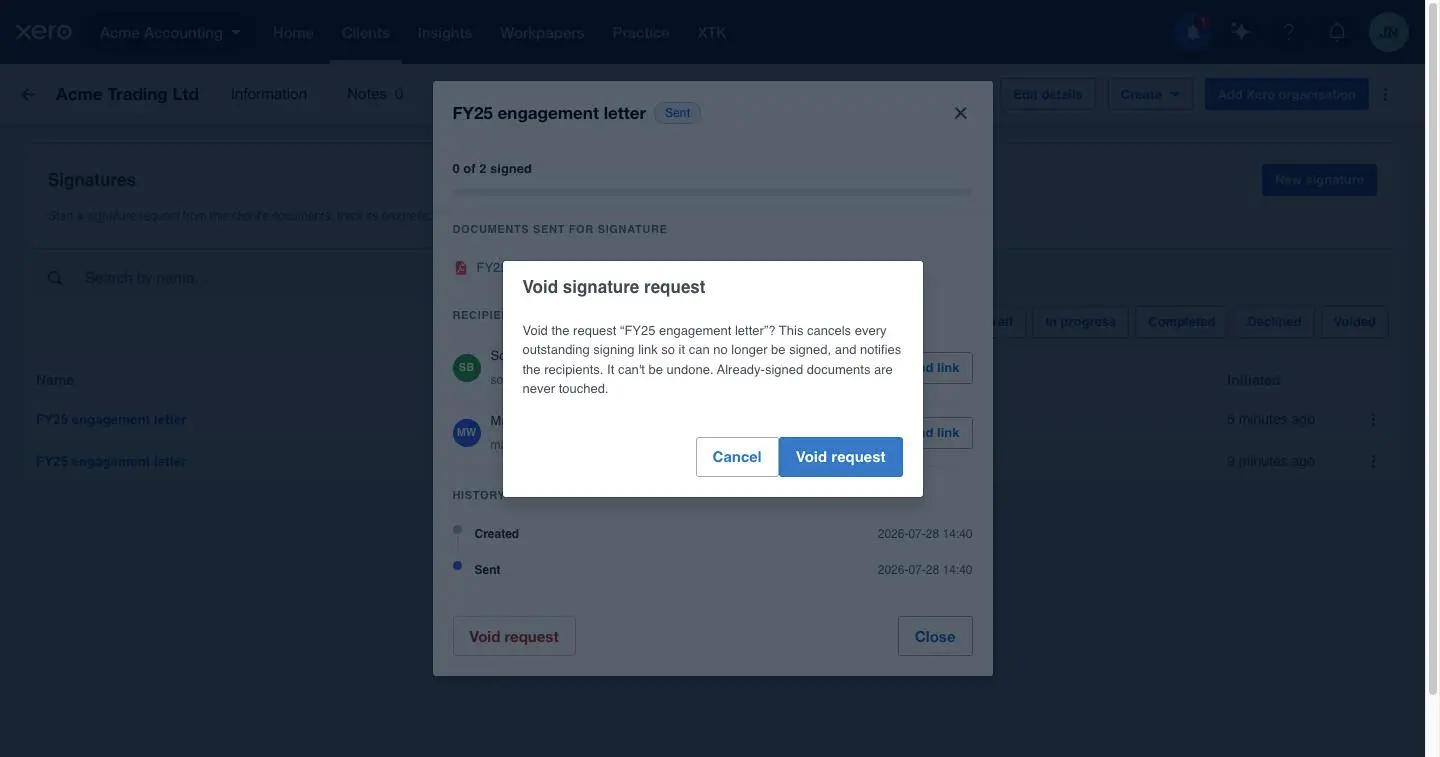
Voiding can't be undone, and the row stays on purpose: a request a client has seen is an audit record. Anything already signed is untouched. A draft is different — “Delete draft” removes it with its documents, recipients and fields.
What happens when everyone has signed?
XTK files it for you. For each document it produces a new PDF with every field value stamped in and a Certificate of Completion appended as the last page, names it after the original with “ (signed)” added, and saves it alongside. The original is never altered or replaced — you keep both — and the same PDFs are emailed to every signer.
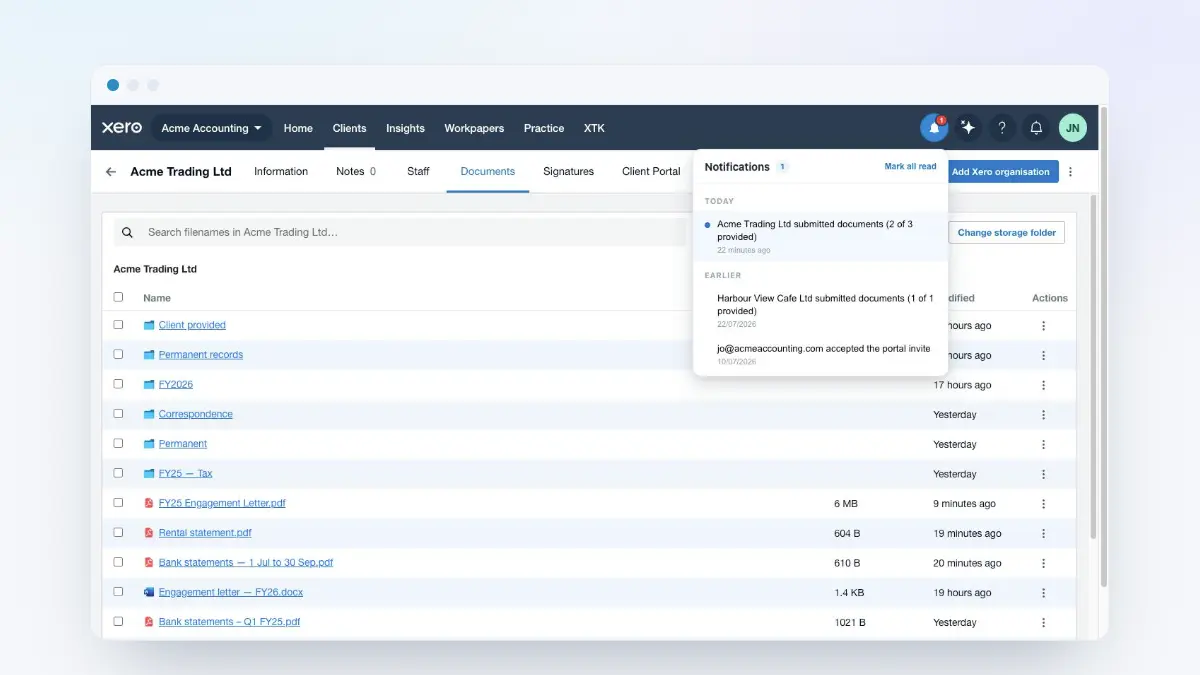
The row flips to Completed and its ⋮ menu gains “Download” and “Open folder”, which jumps to the Documents tab with the new file highlighted. You also get a notification as each person signs and on completion.
Where next
For the other side of this — the email your client gets, the signing page, declining, and what the Certificate of Completion actually prints — read the companion guide on what your client sees. The client documents guide covers the Documents tab the flow starts from, including “Convert to PDF”.
Frequently asked questions
Does XTK charge per signature or per envelope?
No. XTK is one subscription for the whole practice — $59 USD per month after a 30-day free trial — and e-signatures are included. There is no per-envelope fee, no per-signer fee and no separate signature plan, so sending an engagement letter to two directors costs the same as sending nothing at all. The bill stops tracking how much you use it.
Do my clients need an account or any software to sign?
No. Each signer gets an email with their own signing link, which opens the document in an ordinary browser — nothing to install, no password, no XTK account. If that email address also belongs to an active contact on the client's Client Portal, the request appears in their portal Signatures list too, so they can sign there instead.
Can I change the signers after I've created the request?
Yes, while it is still a draft: the draft row's ⋮ menu on the Signatures tab has “Edit recipients”, where you can add, rename, re-email, reorder or remove signers. The web portal page only shows the roster and changes the order — signers are added and removed in Practice Manager, where XTK can search your clients and contacts. Once sent, the list is locked; void it and start again.
Can I cancel a signature request after I've sent it?
Yes — void it. “Void request” appears in the row ⋮ menu and the Status dialog's footer for any request that is Sent or In progress. It kills every outstanding signing link, emails the recipients that it was cancelled, and leaves a Voided audit record. It can't be undone; anything already signed is untouched. A draft is deleted rather than voided.
What proof do I have that a document was really signed?
Every completed request produces a flattened PDF with a Certificate of Completion appended as its final page: each signer's name and email, when they signed, the IP address and device they signed from, the request id, and an integrity hash of the captured values. The same events sit behind the Status dialog's History list, so you can read the trail without opening the file.