Updated 6 min read
Document templates in Xero Practice Manager
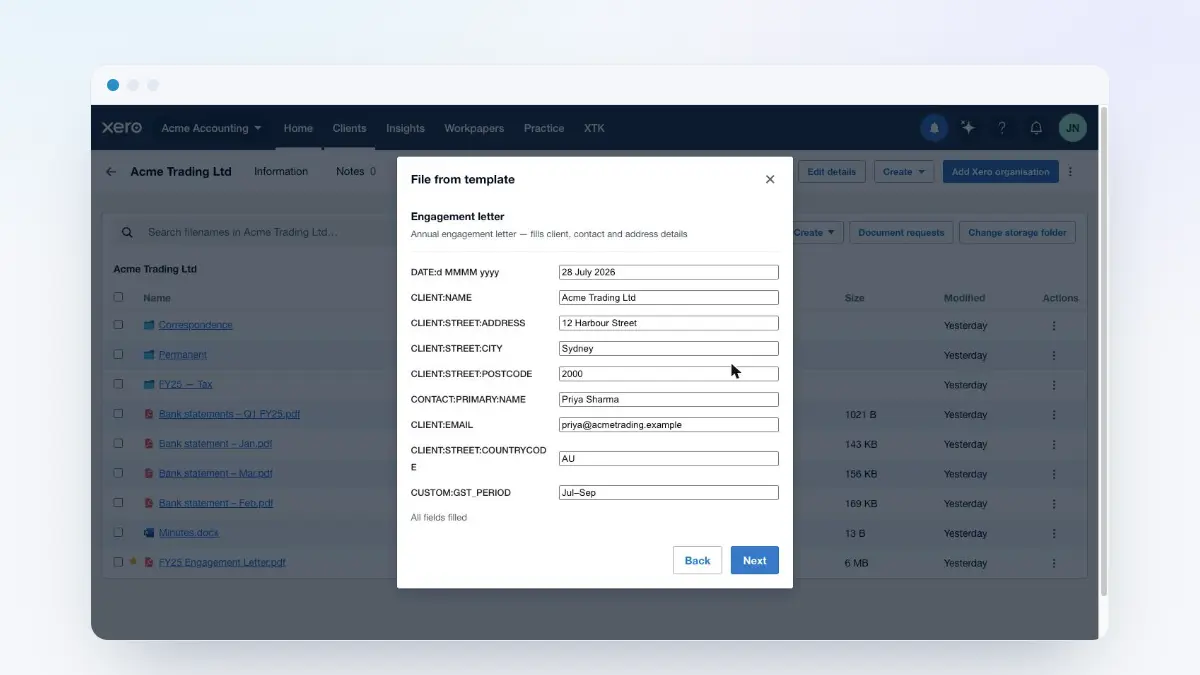
A document template is an ordinary Word file with placeholders like [CLIENT:NAME] where the client-specific details go. Upload it to XTK once, and any team member can generate a finished letter for any client from inside Xero Practice Manager (XPM) — XTK fills the placeholders from the client's own details, you review the values, and the completed .docx lands straight in the client's folder. Engagement letters, fee reviews, ethical letters: write them once, reuse them forever.
XTK is an independent product and is not affiliated with or endorsed by Xero Limited.
How document templates work
The template library is shared by your whole practice and lives in the XTK panel, under the “Document Templates” tab. Behind the scenes the files sit in an “XTK – Templates” folder inside your practice's main storage folder — XTK creates it automatically the first time anyone adds a template, and like every file XTK handles, templates never leave your practice's own storage.
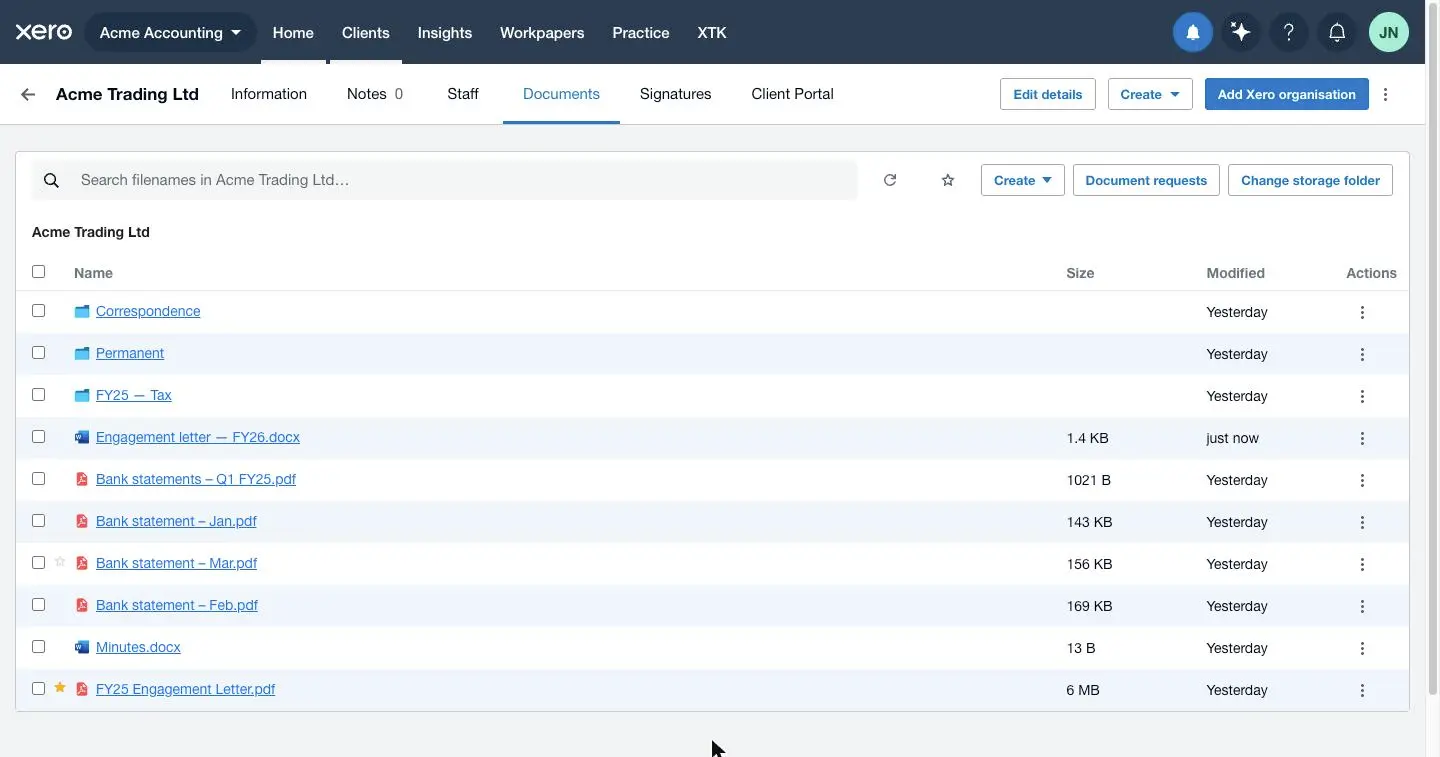
Generating is the other half: in a client's Documents tab, “Create ▾ → File from template” picks a template, fills its placeholders from the client's live details, and files the finished document wherever you choose in that client's folder.
Write the template in Word
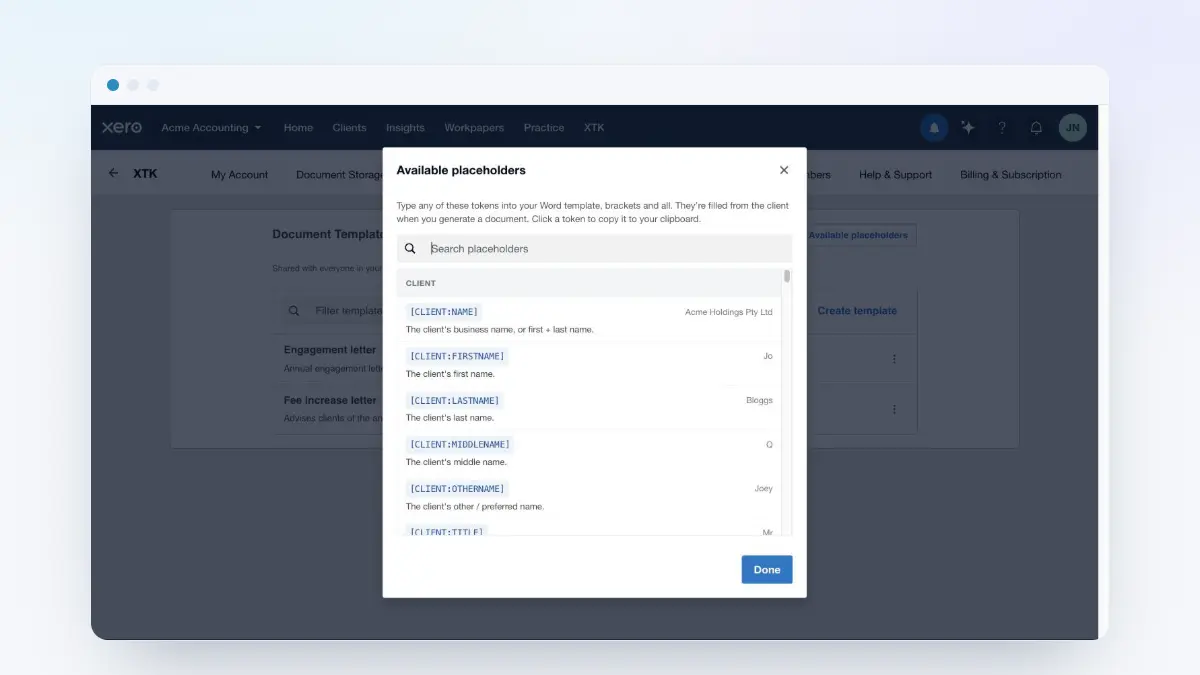
Author the template like any normal document, typing a placeholder wherever a client-specific value belongs. A placeholder is square brackets around a NAMESPACE:FIELD name — some of the most used:
- [CLIENT:NAME] — the client's name as it appears in Practice Manager
- [CLIENT:EMAIL] — the client's primary email address
- [CONTACT:PRIMARY:NAME] — the primary contact person's name
- [CLIENT:STREET:ADDRESS], [CLIENT:STREET:CITY], [CLIENT:STREET:POSTCODE] — the street address, piece by piece
- [DATE:d MMMM yyyy] — today's date, formatted (e.g. 28 July 2026)
- [CLIENT:TAXNUMBER:LAST4] — just the last four digits of the tax number
- [CUSTOM:GST_PERIOD] — any custom field your practice has defined in XPM
The full grammar goes further — conditional [IF …]…[ENDIF] blocks that keep or drop whole passages, date formats, contact and phone variants. The complete list lives in the placeholder reference guide (linked below), and inside XTK itself: the “Available placeholders” button at the top of the Document Templates tab opens a searchable catalogue of every token.
Example: a paragraph that only appears for some clients
Wrap any passage between [IF …] and [ENDIF] and it's kept or dropped per client when the document is generated. Say your engagement letter has a GST paragraph that only applies to Australian clients:
[IF CLIENT:STREET:COUNTRYCODE = "AU"]As an Australian entity, your activity statements will be prepared and lodged each quarter for the [CUSTOM:GST_PERIOD] period.[ENDIF]
Generate the letter for a client whose street-address country code is AU and the sentence appears (with the GST period filled in); for anyone else the whole passage — markers included — vanishes. The comparison ignores case and surrounding spaces, and the value being tested shows up as an ordinary field in the fill dialog, so you can see and correct what the condition will act on before creating the document.
Conditions come in three shapes, and that's the whole grammar — there is no AND/OR and no [ELSE] (for either/or text, use two blocks back to back, one with = and one with !=). Blocks can nest inside each other:
- [IF CLIENT:MOBILE] … [ENDIF] — keeps the passage when the field has any value at all
- [IF CLIENT:STREET:COUNTRYCODE = "AU"] … [ENDIF] — keeps it when the value matches
- [IF CLIENT:STREET:COUNTRYCODE != "AU"] … [ENDIF] — keeps it when the value differs (including when it's empty)
Add the template to XTK
Open the Document Templates tab
In XPM, click “XTK” in the main navigation to open the panel, then choose the “Document Templates” tab.
Click “Create template”
Give the template a name your team will recognise, add an optional one-line description, and click “Attach files” to pick your .docx (up to 25 MB — Word .docx only, not legacy .doc).
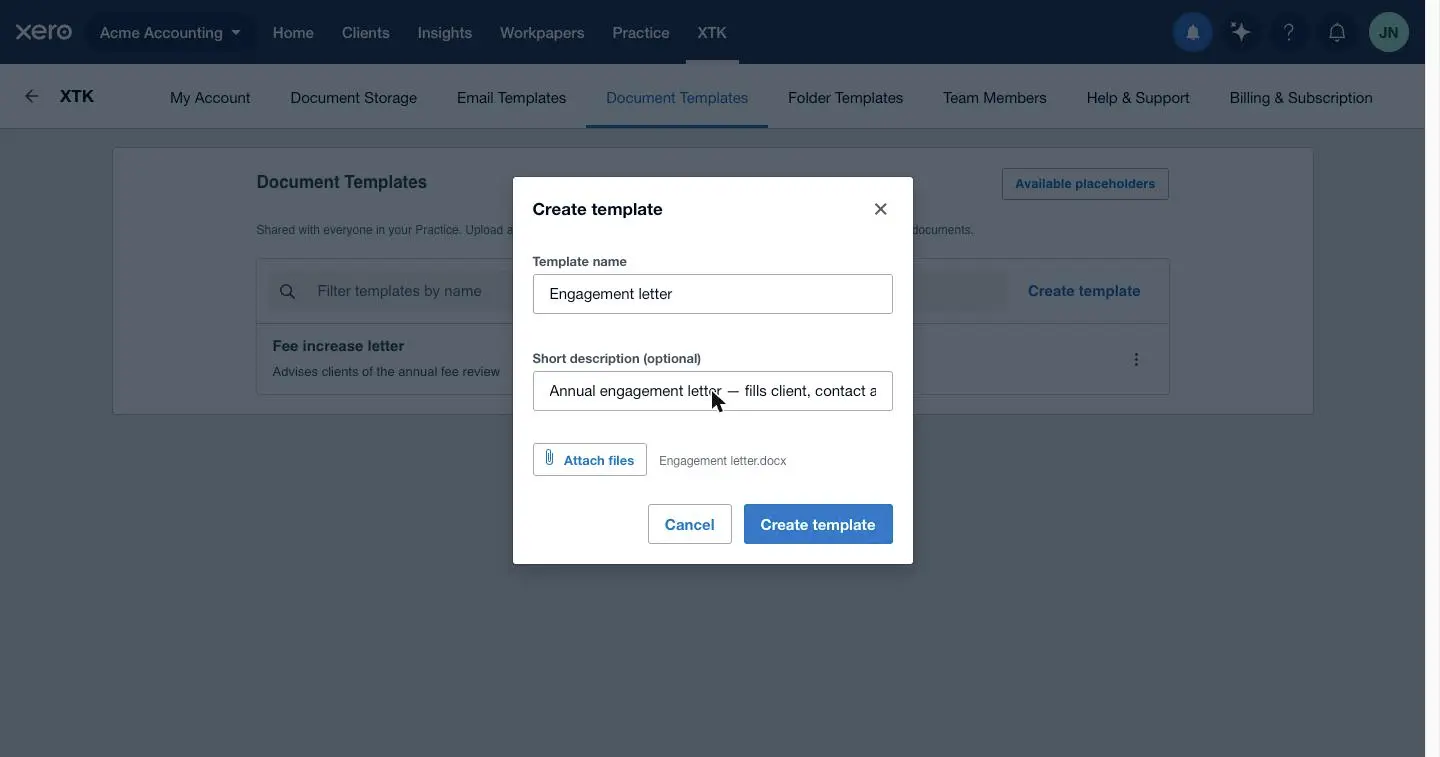
Click “Create template” to save
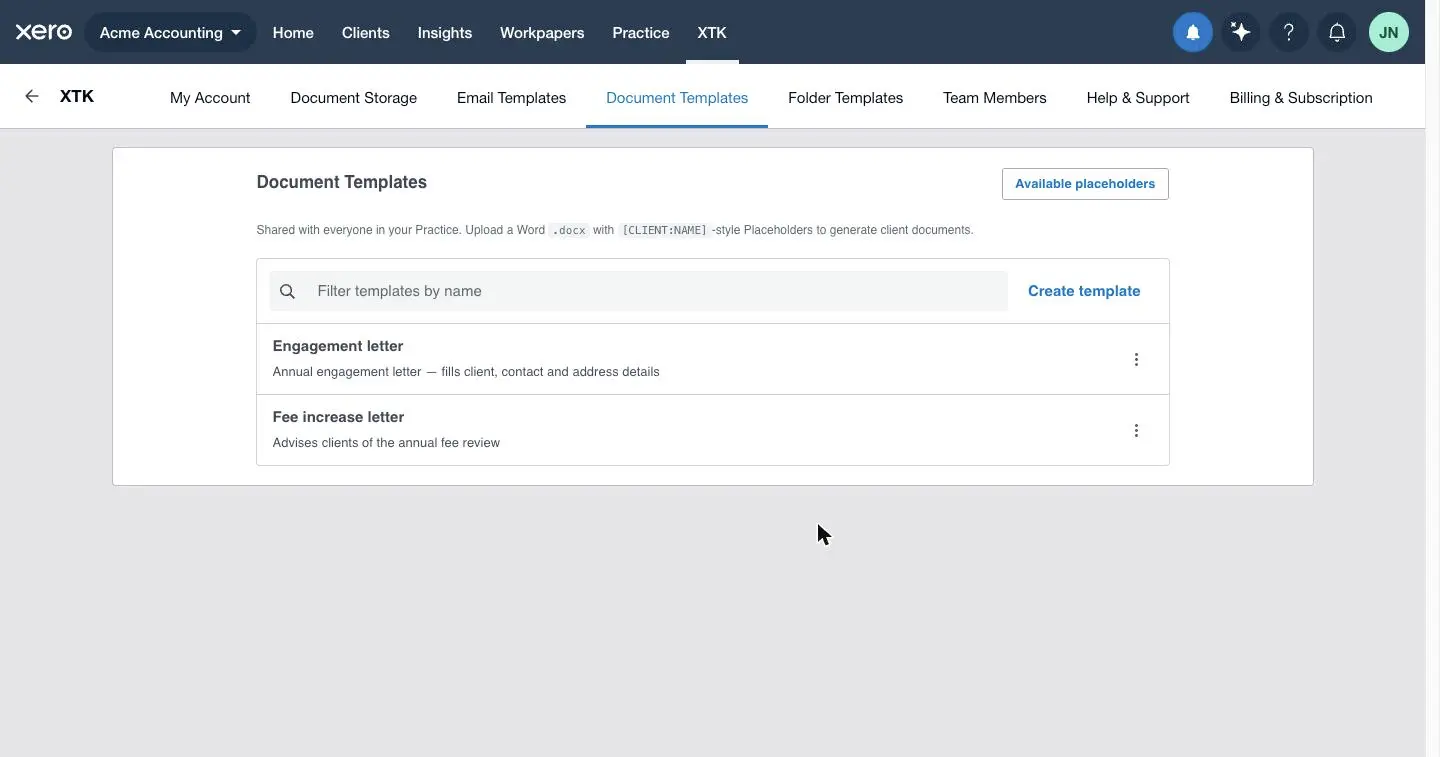
The template appears in the practice-shared list, ready for anyone on your team to use.
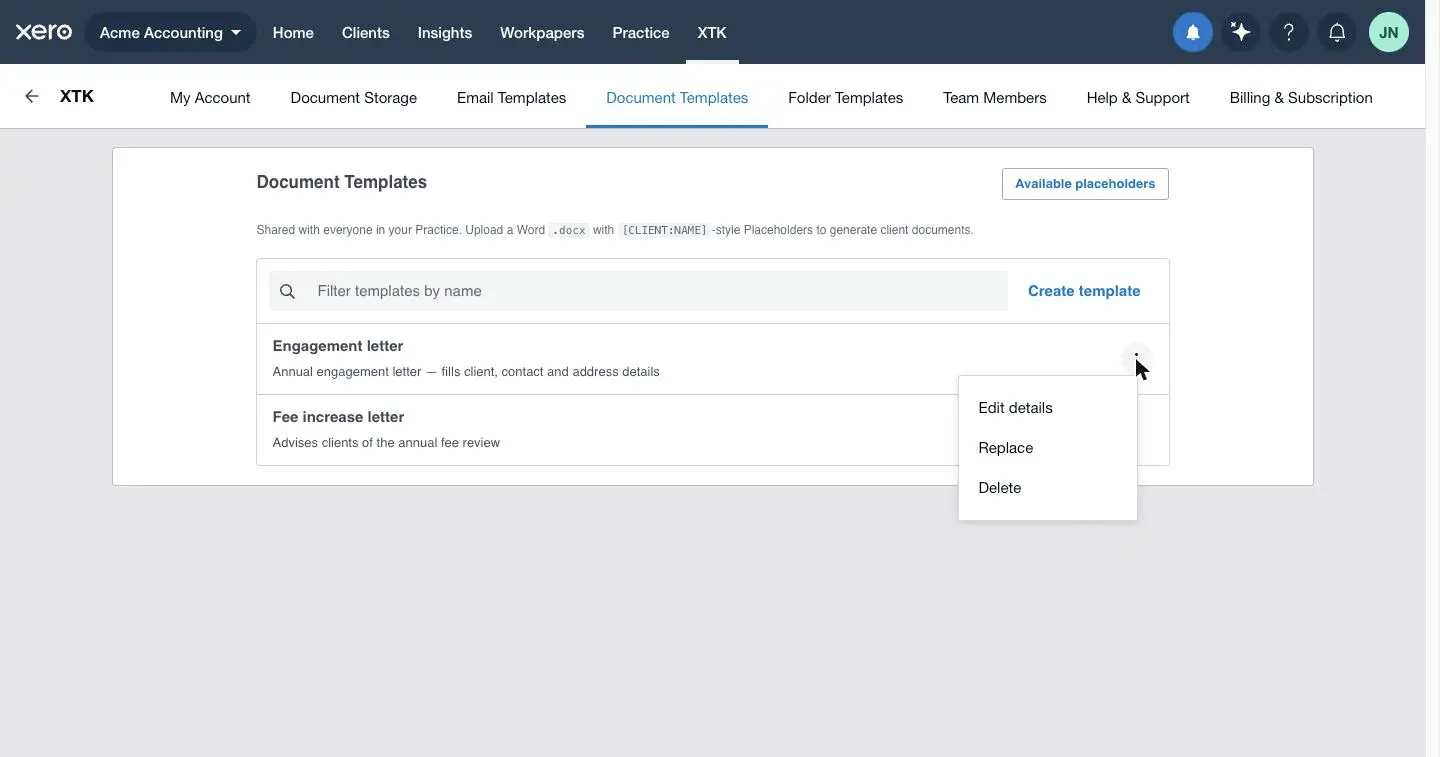
Each row's ⋮ menu manages the template: “Edit details” renames it or changes the description (clicking the row does the same), “Replace” swaps in a new .docx while keeping the name, and “Delete” removes it for the whole practice after a confirmation.
How do I generate a letter for a client?
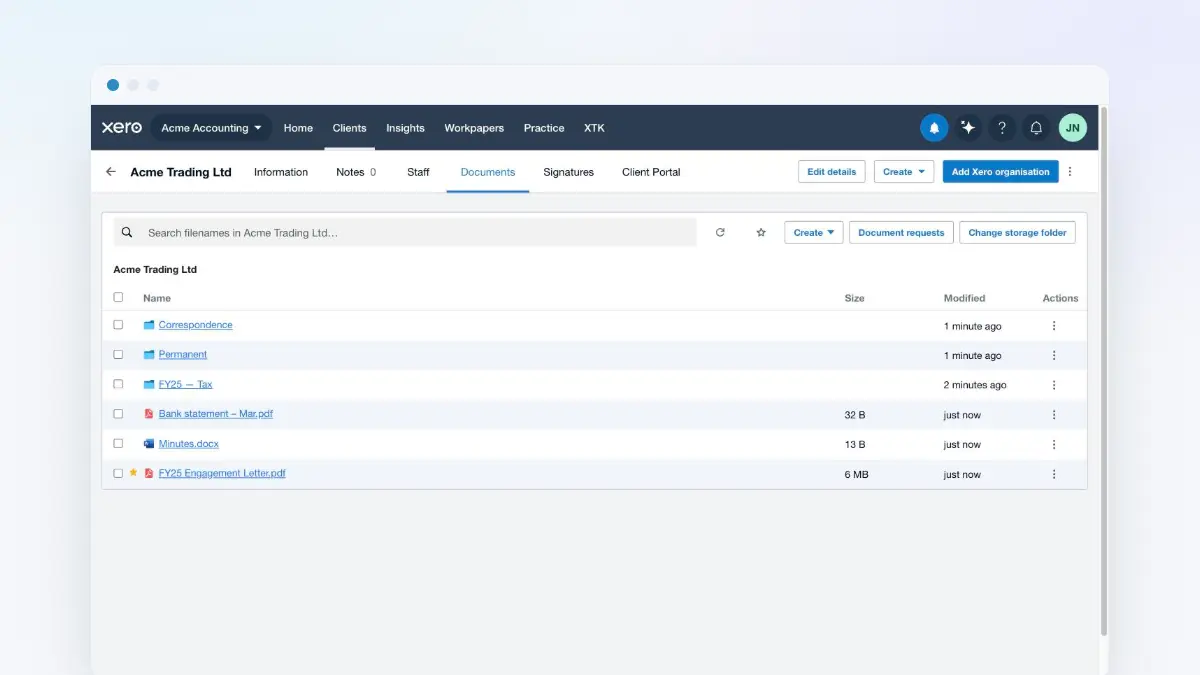
Open the client's Documents tab
Find the client in XPM and open the Documents tab. If you want the letter in a particular subfolder, browse there first — the destination defaults to the folder you're viewing.
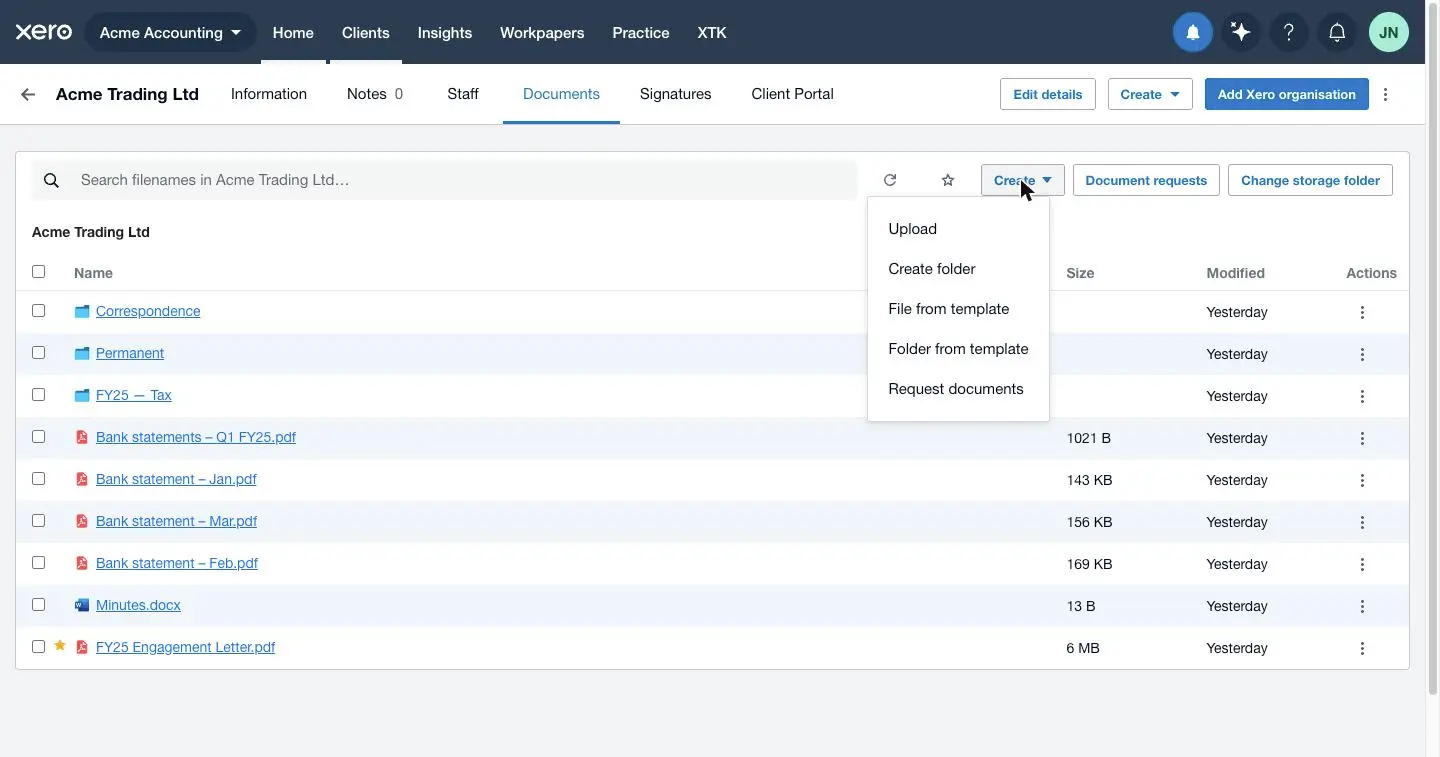
Click “Create ▾ → File from template”
The template picker opens with your practice's shared library.
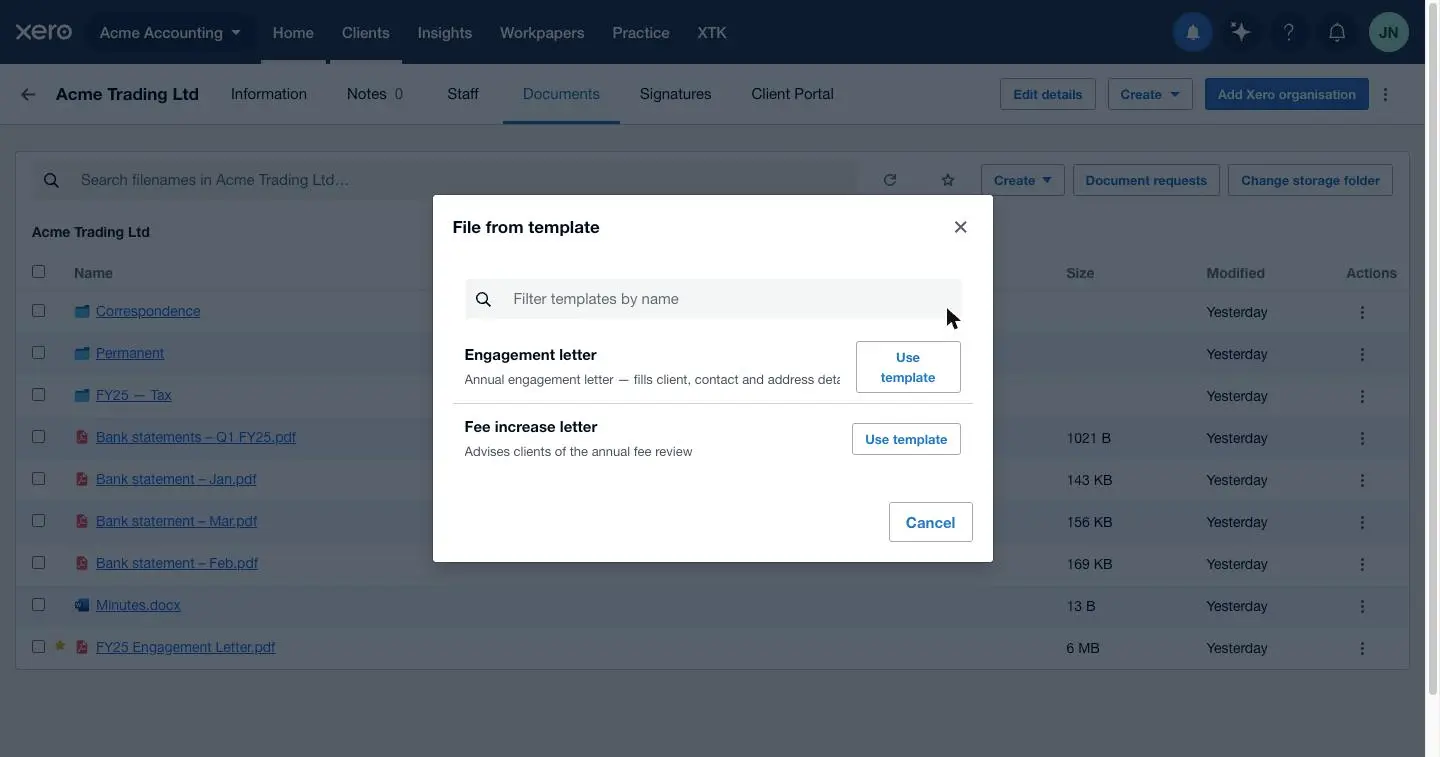
Pick the template
Filter by name if the list is long, then click “Use template” on the one you want.
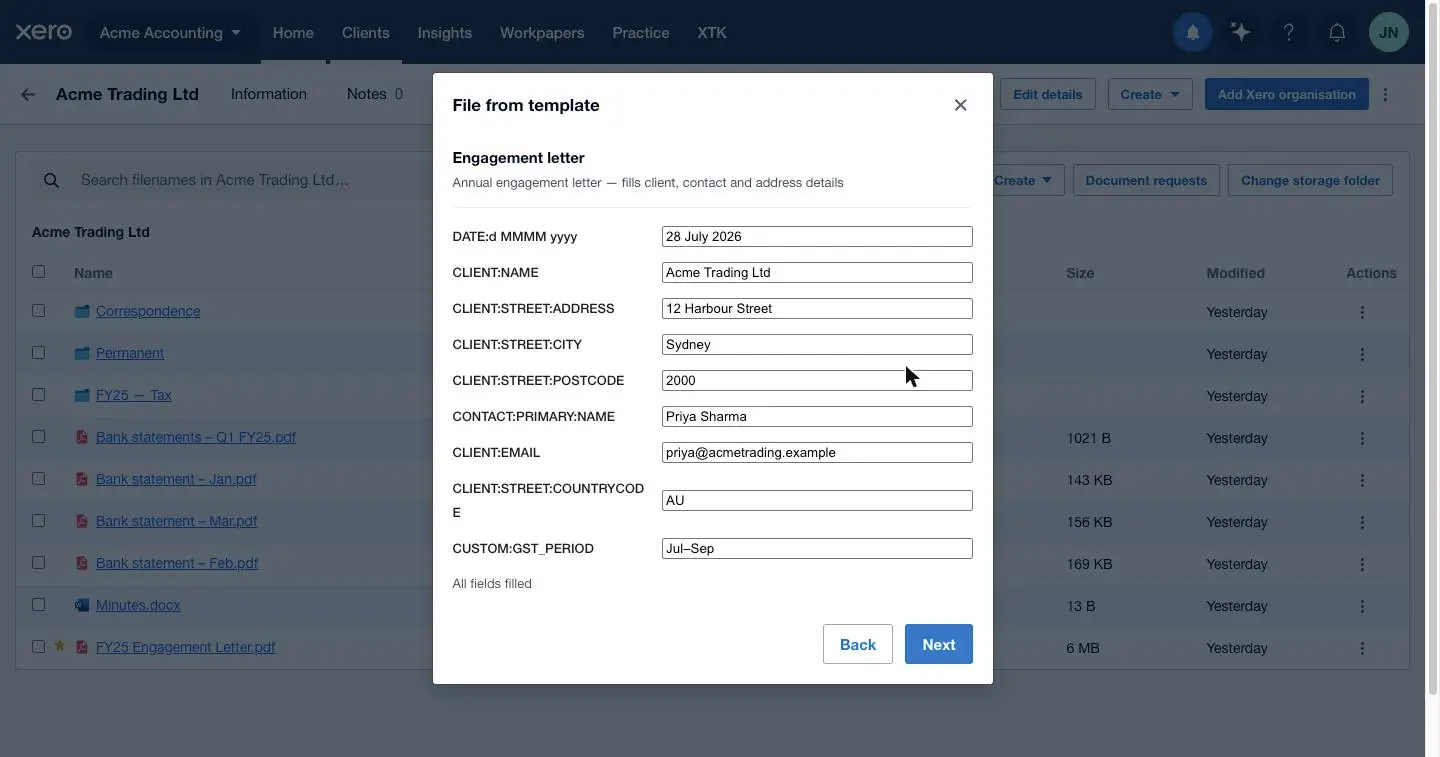
Review the placeholder values
XTK lists every placeholder the template uses, pre-filled from the client's details wherever it can — name, email, address, dates. Every value stays editable, and anything XTK couldn't resolve is left blank for you to type. A line under the fields tells you how many are still empty.
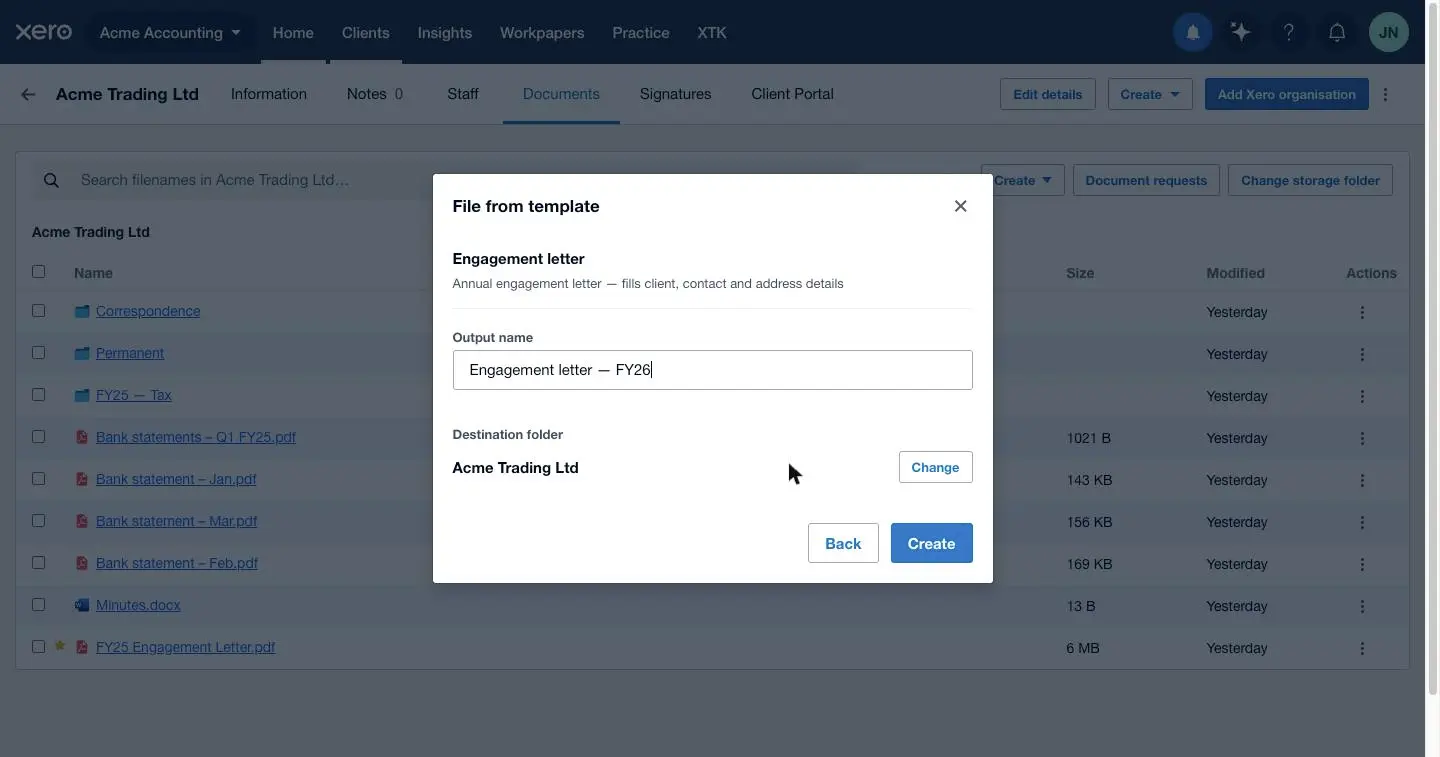
Name the output and choose its folder
Click “Next”, name the document (the .docx extension is added for you), and check the destination — “Change” opens a folder picker limited to this client's own folder.
Click “Create”
XTK stamps your confirmed values into the template and files the finished .docx in the destination folder — the original template is untouched.
Tips from practice
- Give templates names your team will scan for — “Engagement letter”, “Fee increase letter” — and use the description for when to use it.
- Put [DATE:d MMMM yyyy] in the letterhead instead of typing dates; every generated letter is automatically dated the day it's created.
- Wrap jurisdiction- or entity-specific paragraphs in [IF …]…[ENDIF] blocks so one template serves your whole client base.
- Generated files are ordinary Word documents — need a PDF or a signature? Use “Convert to PDF” on the generated file's row menu, then “Send for signature”.
Where next
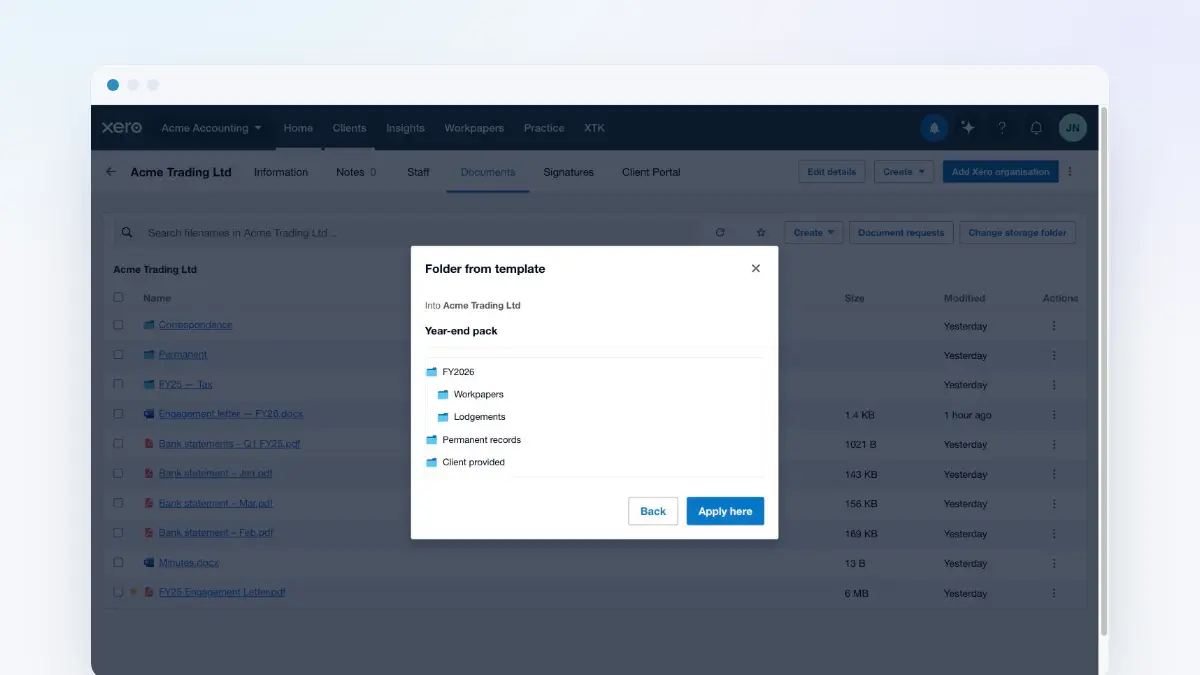
The placeholder reference lists every token the templates understand, with sample output for each. And if you find yourself creating the same folders for every client before filing letters into them, folder templates lay down a standard structure the same way — from the same Create menu.
Frequently asked questions
What happens to placeholders XTK can't fill in?
Nothing breaks. Fields XTK can't resolve from the client's record are left blank in the fill dialog for you to type; anything still empty when you generate is stamped into the document as its literal token, like [CLIENT:MOBILE], so you can spot and fix it in Word. Generation is never blocked by missing data.
Who can manage document templates?
Everyone. The template library is shared across your practice and any team member can add, edit, replace or delete templates — none of it is Admin-only. That also means a deleted template is gone for the whole practice, so agree changes with your team first.
What file types can I upload as templates?
Word .docx files only, up to 25 MB each. Legacy .doc files aren't accepted — open them in Word and save as .docx first. PDFs can't be templates because generated text can't be stamped into them.
Where are my templates actually stored?
In an “XTK – Templates” folder that XTK creates inside your practice's main storage folder in Google Drive, OneDrive or SharePoint the first time anyone adds a template. Like everything XTK touches, the files stay in your practice's own storage.
If I update a template, do previously generated letters change?
No. Generating a letter creates a stand-alone .docx in the client's folder with the values stamped in — it keeps no link back to the template. Use “Replace” in the template's row menu to swap in a new version for future letters; everything already generated is untouched.
Does generating a document change my client's details in XPM?
No. XTK only reads the client's details from the page you have open, and only to pre-fill the dialog. Nothing is written back to Xero Practice Manager, and the values you confirm are used once to stamp the document.